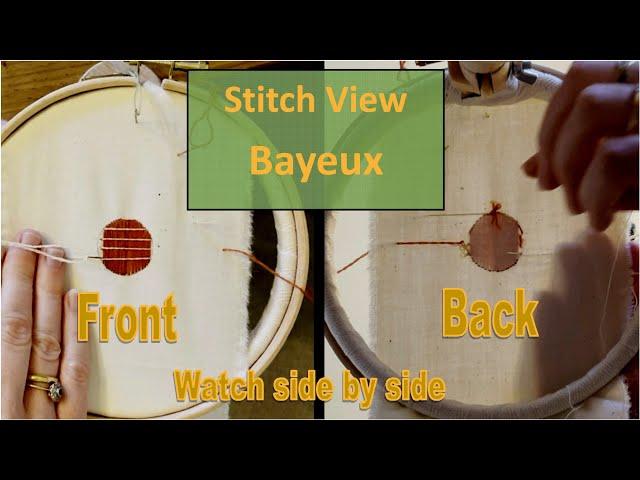
How to Embroider Bayeux Stitch / Laid and Couch
Комментарии:

Thanks for this! Question: Do we have any other examples of this stitch being used in the middle ages, or is it only known in the Bayeux Tapestry?
Ответить
Thanks for this, it's so useful to be able to see the front and back being worked at once!
Ответить
My first attempt using some wool and pattern from Bayeux itself was nothing like this think I may another go good job I bought 4 different kits
Ответить
this is exactly what my pattern called for and your tutorial is great! Now i can finish my project in confidence. Thank you.
Ответить
Very helpful tutorial.
Ответить
I went to see the British copy of the tapestry in Reading museum and I was interested in how it was stitched, especially the filled in horses etc. this video is so clear and useful and has helped me understand how the stitching is done. Thank you
Ответить
I have a copy of the Bayeux Broderie booklet that describes the length of the stitches as being 'no further than 4 to 5 cm' but there is no indication of how wide the work should be. Can you help please? Alan
Ответить
Dommage que la vidéo soit de mauvaise qualité, on ne voit pas grand chose
Ответить
Ma'am, can you please tell me how long the stitch can be.
Ответить
Thank you for taking the time to teach this stitch.
Ответить
A front AND back view? And history? I have to subscribe! I know you said there’s a variety of ways for finishing thread on the tapisserie de Bayeux, was it the same for starting? Did they use knots?
Ответить
What a great video.
I'm going to try this technique to stitch an image of friends that I do Living History with, sort of as a family foto. Hope all goes well.
Now, one question: is it better to do the outlines before or after the laid/couch work?

Such a good idea to show the back and the front at the same time.
Ответить


