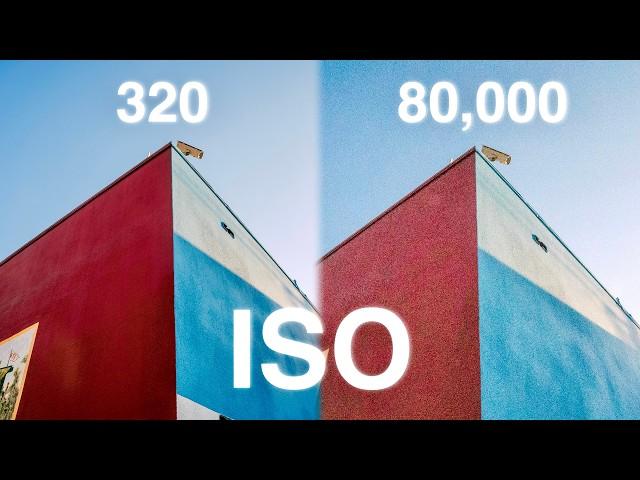
Learn ISO In 2 Minutes | Basic Camera Settings Tutorial
Color Graded with Dehancer - Get 10% Off https://www.dehancer.com with promo code "VICTOR"
Get 2 months free with Track Club (music licensing): https://trackclub.com/referral-landing?via=victor-melchor
Descript (text based editing software): https://get.descript.com/8a3tm8schqme
Gear:
Main Camera: https://amzn.to/3C81UI5
Main Lens: https://amzn.to/3RXvmYM
Main Ultrawite Lens: https://amzn.to/3RYUYEX
Main Mic: https://amzn.to/44P1AuE
Variable ND Filters: https://amzn.to/3dHCTdm
Nisi Black Mist 1/8 Filter: https://amzn.to/3r6wlIl
Main Tripod: https://amzn.to/4duW4jP
Bmpcc4k: https://amzn.to/3K4Z8GZ
Bmpcc6k G2: https://amzn.to/44T1y4T
Backpack: https://amzn.to/3r4bZiS
Samsung T7 SSD: https://amzn.to/3WOXJMm
Headphones: https://amzn.to/3DQi620
Instagram: https://www.instagram.com/victor.melchorfilm/
TikTok: https://www.tiktok.com/@victor.melchorfilm
Disclaimer: I am an a part of the amazon affiliate program, so do receive a commission from every qualifying purchase through my links.
#photography #videography
Тэги:
#learn_iso_in_2_minutes #camera_iso #iso_settings_for_photography #iso_settings_for_video #best_iso_settingКомментарии:

🥞
Ответить
For more casual uses, all three settings "adjust brightness" but they also:
- Time: controls motion blur
- Aperture: controls depth of focus
- ISO: controls image quality at lower light levels
Personally, I prefer to use my camera on "semi-manual" (specifically A / Av). I will go full manual when needed, but it's much more convenient to leave the most flexible setting (in my case, time) on auto.

Great series. It’s time to round it up and drop a video on the exposure triangle and explain how ISO, Shutter Speed and Aperture work together.
Thanks for your time and efforts!

Damn, saw the thumbnail and that city is where I grew up. Still have family out there and visit as often as I can. Super neat!
Ответить
good lesson...
Ответить
super helpful!
Ответить
Here’s some ideal ISO settings for different scenarios!
Photo ISO Settings:
Daylight / bright conditions: 100-400
Afternoon / Sunset: 400-800
Evening / Night: 800-3200 (stick to lower isos if your image looks too grainy)
Video:
Always stick to Native ISO. If it’s too bright add an nd filter. Too dark, try finding light or you can bump iso up a bit, just try to stick to native iso for best performance





![“보수공사 시급” 영상 촬영 중 ‘뚝’…브라질 대형 다리 붕괴 [잇슈 SNS] / KBS 2024.12.24. “보수공사 시급” 영상 촬영 중 ‘뚝’…브라질 대형 다리 붕괴 [잇슈 SNS] / KBS 2024.12.24.](https://hdtube.cc/img/upload/azNrYmtfaVBNRVk.jpg)


