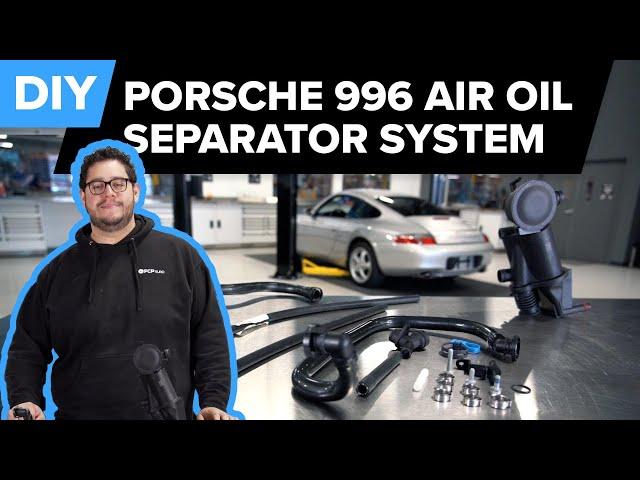
Porsche 996 911 Air Oil Separator (AOS) Replacement DIY - PCV System (1999-2008 Carrera 3.4L & 3.6L)
Комментарии:

What happened to the 850 project??
Ответить
Awesome!!
Ответить
+ 1 Hours ? Thank you so much !
I will take beer's :-)

Did you have to drain the coolant before removing the hose in front of the plenum? I,m asking because that plastic connector brakes easily and I’m replacing it with a aluminum aftermarket part. So I,m wondering if you had to drain the coolant in order to remove that hose.
Another great video, I,m more than impressed👍
Hopefully you work on a clutch change soon😉

I'm proud to know FCPEuro's staff and Principals , and it's amazing growth over the years. Nick, Scot and Max... Y'all have come a long way from the humble beginnings in Groton. I'm excited to see continued growth and success of FCPEuro!! You folks ROCK!!!
Ответить
Massive Job !
Ответить
Sooo impressive! Indeed, massive work. Guess, it only makes sense to also do the oil cooler seals and replace the oil filler tube while in there. So, Michael, How long does it take--really? Kudos for a cool and calm guide that encourages. "Goes in like sin!"
Ответить
Thank you for the informative video. Does a failing AOS also cause low oil pressure when warm? Thanks in advance
Ответить
Thank you for the thorough DIY demo. I want to point out that my '03 model has a different AO separator. The bolts go vertically into the block, not horizontally, and the device itself covers one of the bolts of the intake. Therefore after wrenching endlessly to remove the intake in order to access the AO separator, I'm finding that it's impossible to do so. It seems that one must remove the AO separator first, in order to remove the intake, and since access is impossible, one must drop the engine. Could you, or anyone else here, confirm this? Thank you very much in advance
Ответить
Thanks for the video. Brilliantly presented, and it helped me a lot.
I changed one this week, tricky job, the hardest part was getting to the back 10mm on the intake manifold.

Very talented detailed mechanic.
Ответить
You are Awsome. And the camera guy did really good too
Ответить
Good job !!
Ответить
Nice, thanks! Did I miss the part where you refilled the power steering fluid? :)
Ответить
great technician! very well filmed1
Ответить
Do you have a DIY for sealing valve covers?
Ответить
Thank you so much for the video! I just got a '99 and discovered this series. You got a subscriber here!
Ответить
I'm loving the DIY videos on the 996 Porsche. This makes me way more likely to do it myself instead of paying hundreds to a shop. You have enough details which make the job more easy to tackle. Keep it coming!
Ответить
Another nice FCP how to video. I did my AOS when I dropped the trans to do the clutch, etc. If I had to do the AOS again I think it still would be easier to just drop the trans again rather than go through all this.
Ответить
Great video. However, part numbers should be listed in the description box.
Ответить
Is the long one worth swapping out? Or is there any way to determine if it needs to be replaced?
Ответить
Great video, many thanks going to tackle my AOS this coming week. Can I ask how far you can drop the engine without disconnection? Greetings from the UK.
Ответить
Eff that...i would gladly pay for a pro to do this job...this seem intimidating af....ill tackle changing pads
Ответить
I tackled this job myself, after reading a number of comments stating that it wasn't that hard to do - some had completed it in a couple of hours. I ordered a new AOS, set to work, and finished up the job yesterday. For anyone considering doing this replacement work yourself, here are my stats; The car was up on the jacks for about two weeks. I spent between 1 and 7 hours working on it nearly every day, since I first removed the air box. The major hang-ups for me were the alternator, the coolant tank, the gas line going to the fuel rail (I had to remove it to make room to get the coolant tank out) removing the center plenum (the second one) removing the sixth bolt at the back of the air intake plenum, loosening various coolant hoses and the rubber boot at the bottom of the old AOS, uninstalling the old AOS, installing the new AOS, reconnecting the various coolant hoses, tightening the sixth bolt on the air intake, reinstalling the coolant tank, reinstalling the alternator, and reinstalling the 2nd plenum. Everything else was easy. After all that, the car started... but is still emitting heavy white smoke. There are two possibilities here; either I screwed up the AOS during installation, somehow, or I should have gotten the problem diagnosed by a professional shop, because it now seems likely the problem wasn't the AOS at all, but score boring or something equally disastrous. I'm going to talk to the Porsche shop down the road tomorrow & get their opinion. My car is a 2001 996 .1, incidentally.
Ответить
I have a 2008 997.1 base
I wonder if this is what my problem is. I have light smoke only on a morning cold start. For the rest of the day it doesn't smoke at all even if I get on the gas hard.

Le meilleur
Ответить
bonjour très bonne vidéo je possède une 996 4s de2004 boite tiptronic je n'ai pas d'acces en dessous avec la bv auto faut-il descendre le moteur merci pour votre reponse
Ответить
hi Michael and thank you for works !! one question, by any change is it possible to have a video to fix P0491 & P0492 issues ? mostly related to leak pb. Kr.
Ответить
What a job. Well presented and filmed. Thanks
Ответить
damn baby!!! thanks for the info!!!
Ответить
This video makes me so happy that my engine is already out. This job would be so much easier having 360 degree access all around the engine.
Ответить
Wouldn’t it be easier to just remove the motor?
Ответить
Good job, thank you
Ответить
at 7 min, the engine mount was loosen. Why was it necessary to loosen the engine mount?
Ответить
Does anyone know if the new AOS is suppose to fit flush or is the orange rubber fitting suppose to protrude a bit? It seems like the new AOS design is a tad larger than the original design.
Ответить
Had the dealership service this. Cost $1k
Ответить
Just delete the system. No more issues ever.
Ответить
I’m 21 years of age and managed to do this on my driveway with a couple of jack stands in 12 hours.
Ответить
Thanks for the great videos FCP! Quick question - i have a 996.2 where the the AOS bolts are removed from the top. The bolts i removed are M30 allen bolts. Would you recommend replacing those bolts with a different style? I ordered your oil cooler kit and it came with replacement T30's - i'm wondering if I should use the same style bolt for the AOS
Ответить
Seems like a lot of extra items to remove VS what Pelican Parts suggests. I replaced mine with a Ultimate AOS
Ответить
Just completed this and it took me about 2.5 full days; I have a lift which made getting at the AOS much easier but I couldn't get my rear tire off even with a breaker bar so I had to work in the small opening under the car. Biggest issues for me was 1. removing the fitting on the long line to the AOS and then getting it reconnected securely. Those squeeze fittings are a massive PITA. Messed around over and under the car for awhile trying to reconnect it. I finally held the bottom squeeze fitting in place with a long screwdriver and the handle on my chest while pressing on the top with my finger and pushing on the side of the line with a piece of wood about 2 feet long and an inch square to seat it. 2. Second biggest issue were the idiotic vacuum lines beside the front plenum fittings around the throttle body. Pulled out on both sides from their original seats (the ones in the far back) which required a pair of long forceps and a bright flashlight to re-seat. If you're a surgeon that's probably helpful. Then putting the throttle body in place I'd inevitably press one of the vacuum lines out the back on one side. Don't know how many times I had to re-do that. Also, either Hans in Stuttgart or one of the mechanics working on the car in the past (I'm the original owner) tightened the hose clamps of the right rear plenum so the adjustment screws are not visible and therefore impossible to get off. 3. Reseating the AOS takes some patience as you can't see and can barely feel the hole it sits in. In retrospect, it's not a hard job but loads of patience and really small hands would be a major benefit (I unfortunately, have neither). I could probably re-do it twice as fast now that I've done it once. FYI, I ordered the full replacement kit from FCP but it didn't include the green manifold gaskets. This instructional video is first rate and doesn't miss anything.
Ответить
Curious why y’all didn’t show the removal of the expansion tank
Ответить
Excellent video! Excellent camera shots. Excellent wrenching techniques.
Ответить
Should I change the starter at the same time? What else could I do while I'm in there? 66000 miles
Ответить
God bless you for doing this.
Ответить
I have a 2001 996 and replaced the AOS at 99K. Several shops told me it is necessary to drop the engine to replace this part. I was able to find a mechanic that replaced it as you have. This cost me $400 instead of $1200.
Ответить
Excelent DIY!!!!💪💪💪👍👍👍
Ответить
Excellent video, well narrated, what type of lighting are you using for this video, the blue box that you have under the bonnet
Ответить


