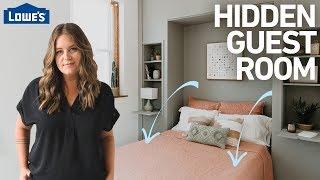
How to Build a Hidden Guest Room w/ a Murphy Bed
Комментарии:

Using pipes for the hinges is an interesting idea. I wonder how that will hold up over time.
Ответить
Great Video! We decided to go with the prebuilt way, it's so much faster and very affordable. We love our Murphy bed and got it with a great deal at Archic Furniture. Got free pillows as it as well. For anyone on the fence, definitely get one!
Ответить
To bad the molding on bed had to be removed every time you used it
Ответить
I wasn't sure the two "nightstand shelves", on the piano hinges? weren't putting too much stress on that hinge, what with lamp, book?, etc.
I gues the piano hinge + the 1/4" under there was going to be strong enough.
And, the hinge "cord" or "bead" doesn't detract? I'll have to study that some more
I do wish Monica had addressed that in just 1-2 sentences -- as well as the potential for framing and sheathing the top cavity for extra storage.
We You Tube viewers can be awfully demanding -- but, the materials would come from LOWE'S, after all.

Extra space for folding tables for sewing projects!
Ответить
awesome!!!!!!!!!!!!!!!!!!!
Ответить
Would it be ok to attache the decor frame to the actual bed instead of using the velcro?
Ответить
Very cool. Nice job.
Ответить
2 birds with 1room lol
Art & Jewelry Studio/Living Bedroom solar lights on demand shower 🚿 hot plate microwave my dad's old Harley Davidson Chopper Shop remod

I wouldve used the empty overhead space for storage. Instead of shelves i wouldve put doors on them so my guests could have somewhere to hang there clothes instead of living out of their suitcases. Also wouldve put drawers in underneath tthe shelves for my guests to use to put their phones wallets meds etc. A head board and overhead lighting too.
Ответить
How did you secure the mattress?
Ответить
Hidden guest room?
It's just a Murphy bed.
I marked this as click bait.

Way cool! I like the space saving Murphy bed.
Ответить
Too much. I tell my guests "sofa city"
Ответить
Very good narration- confidence building
Ответить
🤗 SO LOVELY... WELL DONE X
Ответить
I really like this great job
Ответить
Nice looking, tight carpentry too, but the frame, legs and lifting (need two people) look problematic. Do you know of a heavier duty system that’s easy to open and close? I’m planning on using a king bed.
Thank you for the instructional video!
Jeff

My version of this is to just stick a futon sofa bed into the edge of the room
Ответить
could you use thinner plywood or sheet rock for around the selves?
Ответить
Is there any way to get written plans for this? I think using the area above the bed for some storage would be great. Maybe adding a door for storage...you can never have enough storage!
Ответить
This was so helpful! Such a good tutorial. Thank you!!!
Ответить
Great project - thanks so much for showing us how to do a Murphy bed!
Ответить
You did a superb job making this a DOABLE, not expensive, yet very attractive design. Your tutorial was almost flawless. Would love it if LOWE'S would furnish a Cut List, a Tool list, a Supply list (although it would appear that you've done the Tools in the Video description), + perhaps gauge difficulty + time? Along with a tad more fleshing-out of the steps.
Would be so grateful if Monica, her builder + Lowe's would do that. I would even buy my mattress + paint, etc., at Lowe's! Thx, Monica. Great design + video.

I love this!! There’s nothing wrong with how this was done because this is how they chose to do it.
For myself, I too would tweak it a bit and utilize all the space on the sides. Instead of using the space above as some have mentioned, I’d move the bed up a bit higher, add a desk that can be used as the center support on the underside and add longer legs. (This would allow for a deeper depth desk).
So when the bed is up, it’s a nice little office or study area. Then it’s a truly hidden bed/guest space.
There are a lot of different ways to have done this but this diy video is very inspiring and helps us think of ways to add all our own ideas. 😁

I'm planning a Murphy bed/wall/shelves now. I like the pipe nipple pivots. The ball bearing boat seat swivel some people use is a little overkill for occasional use. The whole notion of trying to hide something the size of a cow in the room seems futile. I consider it an opportunity to make an interesting design project out of it. I can see a number of things in your design that I'll be doing differently.
1. You are not taking advantage of all of the space you have above and below the shelves and bed.
2. I don't like the look of the Velcro-attached trim. It doesn't hide the bed at all. I would just incorporate the 1" gap into the aesthetics with a treatment on the panel.
3. The spackling will just crack, crumble and fall out from between the plywood pieces. I would just put a piece of trim over it or camouflage the crack as a line in the paint design, maybe with a 1" wide black vertical line. Maybe you could edge glue the two pieces together.
4. The feet are too crude for me. They should be recessed a few inches under the bed to keep toes from getting stubbed.
5. With the mattress in place your bed is too heavy not to use gas struts or spring assists. You have a two person job. I can just see the bed crashing down when it slips out of my 71 year old hands while raising or lowering.
6. I'm going to put one or two puck lights for reading above the bed inside the frame.

what if the room has carpet? would you rip it out or build over it?
Ответить
❤great detailed
Ответить
Awesome job I like real nice
Ответить
I am looking for ways to use my guest room for a craft room. I really like the low tech pivot, feet, and lock solutions. I also like the flip out nightstands. For an elderly single person, this design is unsafe to operate solo. But for a couple or a younger, stronger person it would be workable.
Ответить
Where's the OnlyFans link where you two demonstrate how you to break in the bed?
Ответить
Viva la company. Guest von guest
Ответить
you need to let ben talk more
Ответить
There's no cabinet for pillows!
Ответить
Very nice! I love it!
Ответить
I get the velcro concept but just attach the molding to the bed frame only so it comes down with the Bed. but you gave me the best idea. do the same thing with an already blocked out that's a closet, door on the far right. take down the wood paneling and reframe area with your hide a bed framing and then cover the entire area with broken up and painted wood pallets. The pieces will over the seems so that when the bed is up it will look like a castle wall. Maybe even attach a shield and sword to the middle of it. when it is down a beautiful painting will be revealed on the back wall.
Ответить
Very nice build. I would like like to mention that being a person with acid reflux issues, I could raise the pivot point by at least 4 inches to keep my throat above my stomach to alleviate acid reflux when sleeping. So happy to view this video.
Ответить
I really like how this was build in as guess room Amazing and dark Grey color really Nice . For me be more like office space ..
Ответить
Love the idea! Great build, but living in a small historical home, I would have added floor to ceiling shelves as it seems the space above the bed was wasted and under the shelves. In addition, I would have added recessed lighting on both sides at the top as well as above the bed when it is down. The lighting could also be adjustable in illumination from 0 to full illumination. Perhaps even think about Smart bulbs with a remote or ECHO connection for music and to tell Alexa to dim lights by ?% per preference of the guest. I also would have tried to add resistance springs so that one person could grab the bed and pull it down or it locks in place once it's near the top like a normal murphy bed for safety. All in all - great job!
Ответить
What about a king size 🤔🤣
Ответить
how much on average would this cost for materials?
Ответить
I know this is an older video but I'm hoping that someone is still checking for activity.... my question is how did you arrived at the location of the pivot height and depth? The bed looks a little low with the pivot at 6" up that would make the mattress height only 2 1/2 inches above that so the mattress is only 8 1/2 inches above the floor? This info (probably the most important) is not even mentioned. If Possible could someone please provide a little more info on this. Thanks in advance
Ответить
Instead of using velcro (because it would be a pain to take off and put back on and not always be put back on evenly) why not just fasten the molding to the bed and leave a tine overhang to hide the seam? That seams to make more sense and be easier. Other wise very nice. I've also seen people use lazy susan to rotate. What do you think of using them?
Ответить
Where can I find the flange and cap, am I not searching up the correct thing? HELP
Ответить
Great concept but that bed must be heavy without a counterweight. Also there is so much wasted space behind your fake wall. So much storage potential thrown away.
Ответить
Thank you. Great Presentation.
Ответить
Super unprofessional and ugly way to build a murphy bed with closets
Ответить
I know this an older video....but it kills me how much space was wasted above the bed! Absolutely great concept and turned out beautiful. I just think about how much could be stored on top.
Ответить
The only thing that you didn’t show is the patches of Velcro that will be adhered to the wall when the bed is down
Ответить
Put the molding on the bed frame
Ответить